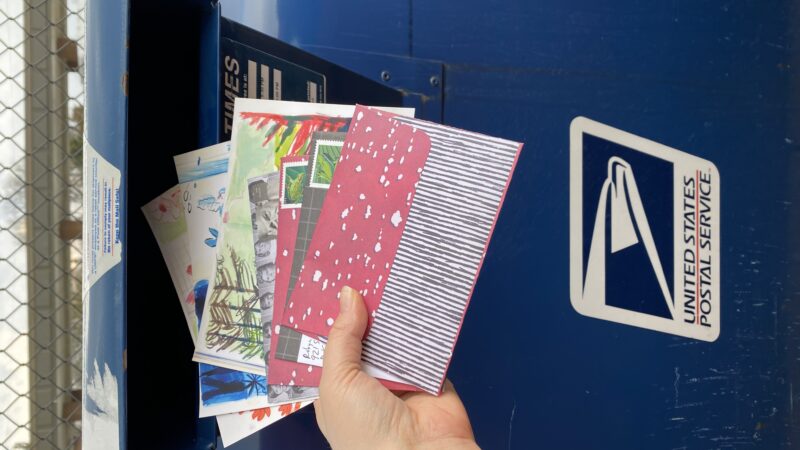
Day 5, a little different. Instead of space we have grass.
I’m going for a 3rd attempt at the silk screen this weekend. Doing prints should be much quicker for next week.
Have a good weekend!
This morning I woke up at 5 am and couldn’t fall back to sleep. Instead I got up and actually started painting my mailart postcard for the day. It was such a nice start to the day. I was in such a good mood in the morning. I’d love to say that I should begin each morning this way, but I also know I’m one to love to sleep in. I know the moment I’d make such a commitment I would not be able to climb out of bed until 7:30 to be at work by 8. In an ideal world…
The top picture was an iphone macro lens shot of the painting this morning. Bright and cheerful.

This is the finished piece. Day 4 of 31 Postcards in 31 days.
For over 200 more pieces of mailart I’ve created, see my flickr photo set here.
Happy Monday! This weekend was my birthday and it was an AWESOME one. I had Friday off and I to went a lot of places and did a lot of things that I’ve been wanting to do for a long time. I took tons of pictures and video, so I hope to return later this week with a great post on that.
In the meantime I thought I’d pop in with a little post today.
The jewelry display post from last Thursday was a hit! I submitted it to craftgawker and it was accepted AND has received MANY-MANY hearts and views. It’s even on the popular page for the last 7 days! And it’s been pinned a lot on pinterest too!
It’s the last full week of the month and this weekend I found a couple of fun projects for October. I think I’m going to jump in on them and so I thought I’d share them here in case anyone else might be interested too.

First, The100 (a photography project to document the lives of 100 people, ages 1-100) is doing a 100 week. October 1-7th, 2012, The100 is asking folks to purchase a disposable camera and document their week on film. After the week is up, develop your film and then share it the pictures online. I’m guessing pictures should be posted to your respective blogs, flickr, facebook, etc., and perhaps tagged with the project name? I have to look around some more and see if there is a flickr group for it already.

The Second project was one I discovered through a hashtag search of mailart on instagram. It’s the 31 Postcards in 31 Days Project organized by The South Side Letter Writing Club. Anyone can join, just send 31 postcards in the month of October. To officially join the “event” accept the invitation on the facebook page. If you want to share and paticipate online, upload your postcards to flickr, tumblr, instagram, etc., and tag them #31postcards. I don’t see anywhere that it is a mailart project, and since it’s organized by a letter writing group I think postcards can be commercially produced cards, but you know me, I’m sure I’ll be creating art to go through the mail.
I went to my PO box and found this beautiful postcard.
A friend with beautiful penmenship just went to Bruges and thought of me. Thank you so much Katie, I almost had tears from reading the back.
and then this postcard below definitely deserves some attention. It arrived a while ago, but I’ve been admiring it ever since.

Lindsay sent me this awesome mailart. It made me think of my own little books I’ve sent out in the mail, only her entire piece is an artwork, and the binding has been sewn together. I remember marveling at them on her blog, and then suddenly one was listed for me. Her mailart is always an inspiration.
I owe both of these girls some cool mail!
I just added these adorable, airmail themed, 1″ pinback buttons to my shop.
This weekend I was thinking of the mail button set (above) that is in my Etsy shop. I wanted to make another set, but in different colors. Like that, all of a sudden it came to me that I should design and print out a red and white striped airmail paper and cut the same envelope shapes out.
I love how they came out, and they were so fun to design and create. I think they would be a cute present to send a penpal.

It is swiftly approaching a year from when I jumped into mailart365. Things went well for a good long stretch, and then as usual when I try to commit to any 365 project, I started to fall further and further behind. Then we bought a house and all the stuff that goes along with that (house hunting, emotional rollercoasters, packing and unpacking) dominated my free time.

The project took it’s final blow when there were major changes at my work and I had to give up my Fridays off. In my defense, creating the art was not the problem, as you might find going into my studio. Sadly, I probably have a couple months worth of cards created that I never sent. The problem was finding addresses, actually addressing, writing, attaching postage, documenting (photographing and chronicling who I sent what card where) and actually dropping off the pieces at the post office.

It never stopped nagging at me that I should be working on the mailart365 challenge. It’s obvious that I won’t get it finished in a year, but I’d still like to finish making and sending out 365 pieces of mailart however long it takes me. Soooo, when I saw Hanna was starting to organize her annual postcard swap I thought it would be a perfect way to jump back in and get the ball rolling again. Create 10 mailart postcards and get 10 pieces back through the mail by different artists. Last year there were 2,800(!!!) postcards swapped through this postcard swap. That’s a lot of art going through the mail. Hanna is asking for a $6 (US) donation towards participation this year just because it is a lot to organize and take care of. If you go here, you can check out all the details on the project. Sign up ends March 7th, so there is still plenty of time.
I have a new pattern I’m loving and it’s the pinwheel. It started out earlier this year when I was seeing this pillow by Fine Little Day all over the craft/art/design blogosphere.
Seriously. I was obsessed. The things I loved the most about it was the use of a wide range of colors, AND that the color application looked very handmade. It didn’t look like a store bought and manufactured design, it looked like someone just colored on this pillow with some markers.

Next I saw this awesome garage door on pinterest. How can a person not smile while driving by this house?
Then a couple weeks ago I saw this post by Elise Blaha. This girl is awesome, if you don’t already follow her blog, do so now! Turns out I wasn’t the only one inspired by the pinwheel. She made this lovely painting above, WITH a tutorial on how to make your own to boot! I think I will be making one of these shortly for our new home. (I love to say that)
The pinwheel is so cheerful I think. This week I present to you my pinwheel mailart, tada!

I’m starting out with my favorite, which was also the last card I did in the series this week. I painted all the yellow and then had the idea to draw in a floral pattern like some of the vintage fabric I have. The solid yellow is watercolor and the flowers are colored pencil. I’m so in love with this, don’t be surprised if I do a whole series based on this idea for next week.

Thinking about it, it makes perfect sense, the fabric inspiration and the pinwheel. The pinwheel pattern in a very common quilt pattern. My mom is a quilter and I was regularly taken to quilt shows as a child. The pinwheel pattern inspiration really touches on this art, design and quilt kind of a thing for me.

The three above were the last three I did.

And this is where I started, with the variety of colors and the apparent texture in mark making.

I made the cards using a variety of colored pencils, water colors, dry pastels, sharpies and highlighters.
Today is a HUGE day for me. Something that has been in the works for over a year and a half, and I’m so excited. I will be dealing with that immediately after posting this, but first I just wanted to share my most recent mailart pieces for the 365 project. I will be back as soon as I can to share more about my exciting news.
A couple weeks ago I saw this tutorial post on Oh So Beautiful Paper about embossed stationery. It brought me back to high school graphic arts, first semester. We were learning about business cards and just to show how far things have come since then, the teacher told us if a business card wasn’t embossed (quickly checking by running fingers across the card), most people in business would just throw them away. Flash forward to today, embossed cards are definitely in the minority. I work for a printing company and we don’t even have embossing capabilities in house, so any embossed business card orders we receive get farmed out and it is a very rare occurrence. At any rate, back in high school we got to play around with embossing so I knew how to do it, but haven’t done any since then. Immediately after reading this post, past 8 pm, I HAD to run to Michael’s to see if they had any embossing powders and fluid and I was thrilled to find a selection. I found a stamp pad that also came with a small bottle of fluid, which was perfect for me.

If you are not familiar familiar with embossing, it’s a method in which you get a raised type. Above are some thumbnails at an angle so you can see how it looks. I also encourage you to click on the link at the top and see a picture tutorial. But basically an image is printed with embossing fluid on paper and then the embossing powder sprinkled over it. The powder adheres to where the fluid was and the excess is removed. Then the powder is heated and the powder melts and sticks together and looks more like a raised liquid on the paper.

I started out by carving a few small little triangle stamps to make some banners and test out the embossing process.

When I think of banner messages, I think of sayings like “SURPRISE” or “HAPPY BIRTHDAY” so I though it would be funny to make some banners that were a little less exciting, like “it’s your birthday… or not!” and “I don’t want to go to work!” Wouldn’t that be funny to walk into a party and that was the banner hanging there?

At first I only bought black and green, so the next day I went back to see if there were any other colors I’d like. I decided to play with some other carved stamps I made.

This is when I started experimenting with painting with the embossing fluid in the bottle.

This is when I got the idea to thin out the fluid and put it in my Kempar Drawing Pen that Rosa gave me eons ago. That pen comes in handy so often!

I was able to get multiple colors by drawing out one part, sprinkling the powder and then drawing another and repeating. I learned if I heated each color between each color by the end the original colors would start to flatten out and get absorbed into the paper.
Lastly, I went over many of the finished cards with light, wet layers of watercolor. I had a lot of fun making these, and I know this will not be the last time I have embossed things to share… I’m thinking maybe some paper products for the etsy shop!
This lovely post comes with a soundtrack: I’m Writing A Letter by the Smoking Popes :)
Write Me Pen Pal collage, To Get A Letter Write A Letter pin, Happy Red Address File, Repurposed Envelope and Stationery Set