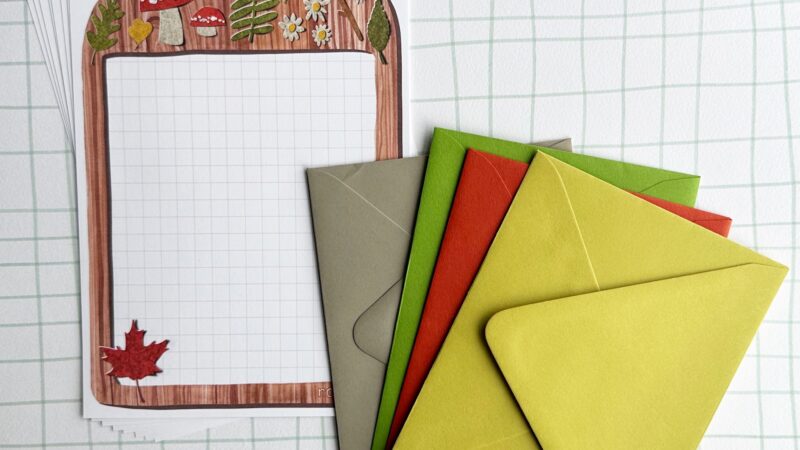
I had an idea a couple weeks ago to paint a wooden watercolor border. The idea is that I can swap out elements on top for different themes, seasons or...

I had an idea a couple weeks ago to paint a wooden watercolor border. The idea is that I can swap out elements on top for different themes, seasons or...
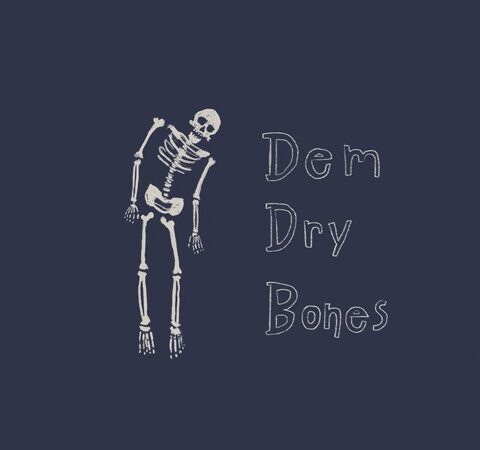
Over the summer I made this ghost in the graveyard stationery/note paper but then never did anything with it. I was really proud of that skeleton and the headstone, and...

I have a brand new stationery set that is available in my Etsy Shop here. It is a 4 page printable PDF only, for now, and it was made entirely...
One of the first inspirations I had in making mailart was an editorial in Real Simple magazine, probably in 2000 or 2001. The editor told a short story about lamenting...
For the final installment of my 100 day project recap I'll be covering my gelatin printing and work that came from that, over the 100 days From the get go,...
Back again with another installment. The first reason I chose to focus on paper products for my 100 day project was because I had so many letter writing paper sets...
Look at me, back so soon with the next installment of #robayre100days! In the first post I left off right before I got to my quilted fauxdori travel journal covers...
I have FINALLY conquered #the100dayproject! I know, I know, it took me WELL OVER the 100 days. In my defense, I could have easily wrapped it up in the 100...
As I said before, my Etsyversary party is not over yet! I'm offering this letter writing paper as a free download through the rest of the month! Insert party emojis...
robayre.etsy.com is still celebrating 10 years! For the month of May, please use the code ROBAYRE10YEARS at checkout for an additional 10% off. Today I gathered up all the entries...