
This weekend was the 12 Hour Craft Extravaganza that my sister’s church organizes. It was my second year attending. Some may think “12 hours of crafting!? How can you stand to sit and craft for that long” but really, it goes by soooo fast. Both years I have brought so much stuff, thinking I’d accomplish so much, and in the end realize you would need several more 12 hours to finish it all.
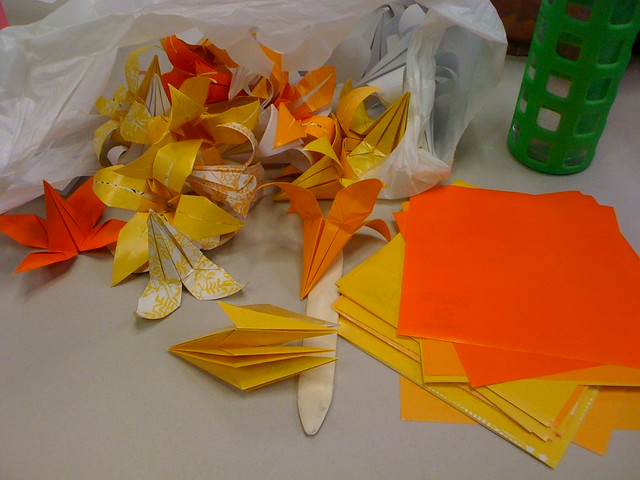
I’ve been working on this origami project where I will need about 150 origami lilies. I worked on it for 2 hours that day and I think I only finished about 10 lilies. I timed myself and if I’m focused and work straight through it takes between 6 to 7 minutes to fold one lily, not including curling the leaves. This means there was a lot of breaks and chatting while working. I had gone in thinking I might be able to finish all of the pieces, yeah right.
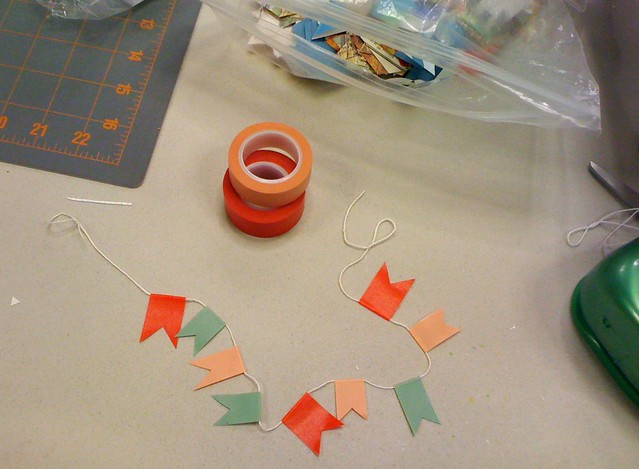
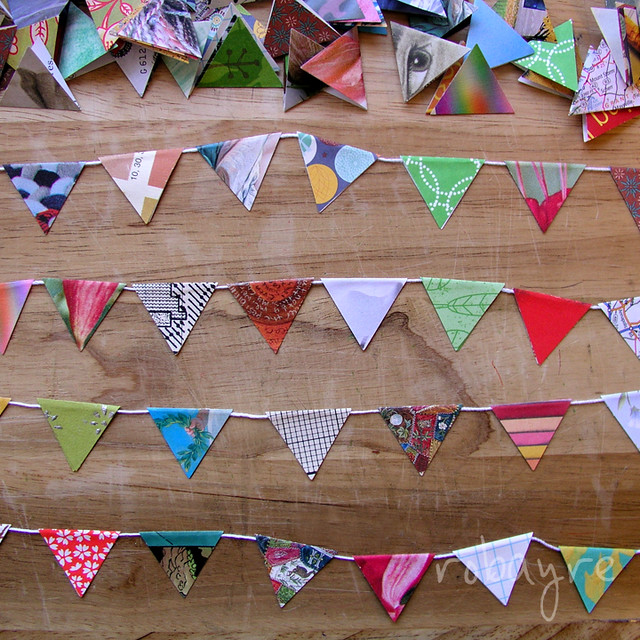
Next I worked on some bunting. I had been wanting to make some washi tape bunting for a while, so I did that. It wasn’t as quick and easy as I had imagined. I also made some of my regular itty bitty bunting for my etsy orders.
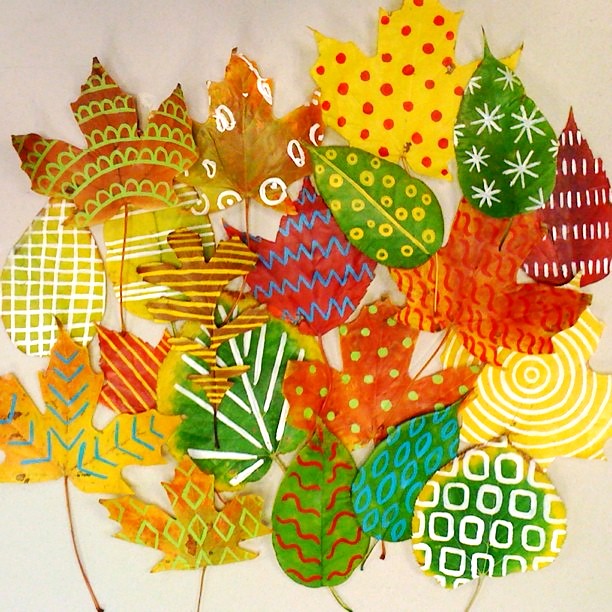
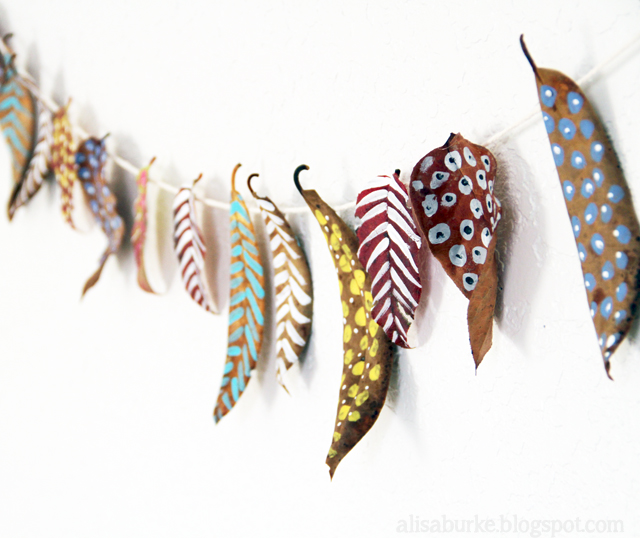
My big project were these leaves above. They were inspired by a post on Alisa Burke’s blog where she painted right on leaves and made a garland. I can not remember the original source, maybe craft magazine or craft gawker? There was the Martha Stewart DIY about dipping leaves in wax to prolong their colors. It makes me think of ironing leaves in wax paper during elementary school, but with dipping you get the beautiful and dimensional leaves alone, not stuck together, hidden between papers.

Alisa’s leaves on the left, Martha’s leaves on the right.
The leaves have been falling and I remembered these crafts that I had pinned…
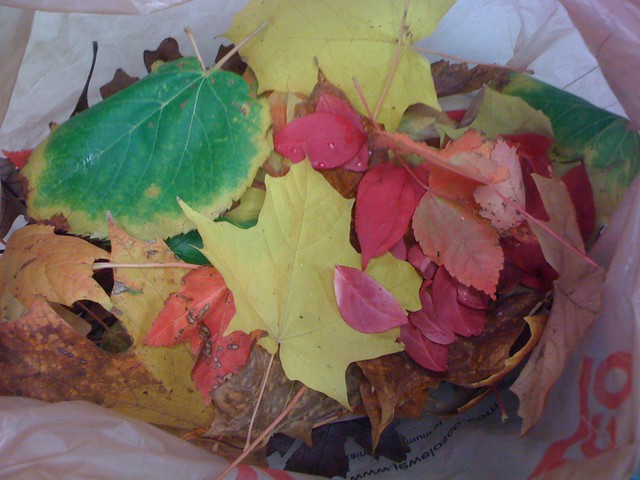
so I gathered as many different colored and shaped leaves as I could find.
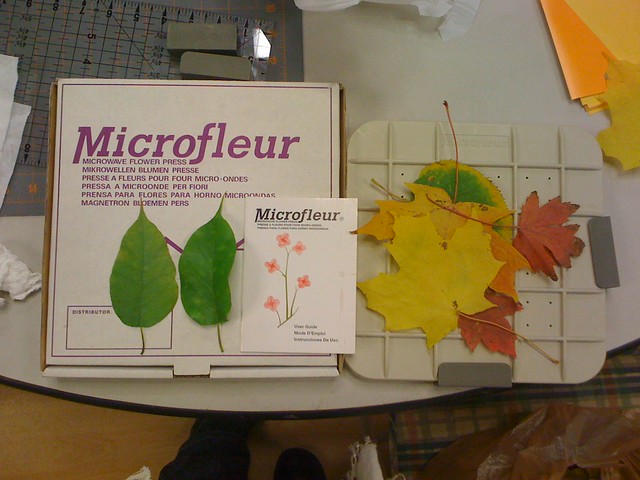
A fellow crafter at the event told me about a tool she had and then ran home real quick to bring it back to me. It’s called the Micrfluer and allows you to press and dry leaves in the microwave in about 45 seconds. Not only is it speedy, but it also retains the color much more than pressing the leaves in a book. In the picture above you can see the two green leaves. The one on the left is pressed and dry, while the one on the right is still curled and wet. As it turns out my sister also has one of these tools so she lent it to me.
A couple cool things about the Microfluer: Once you have the tool that is all you need. You don’t need to keep buying replaceable parts that get used up with every pressing. Also, after you dry the leaves they remain fairly flexible, unlike leaves dried in a book which become brittle and crumble apart. The woman who lent me the contraption even had some leaves she said were 8-10 years old and are still perfectly fine!
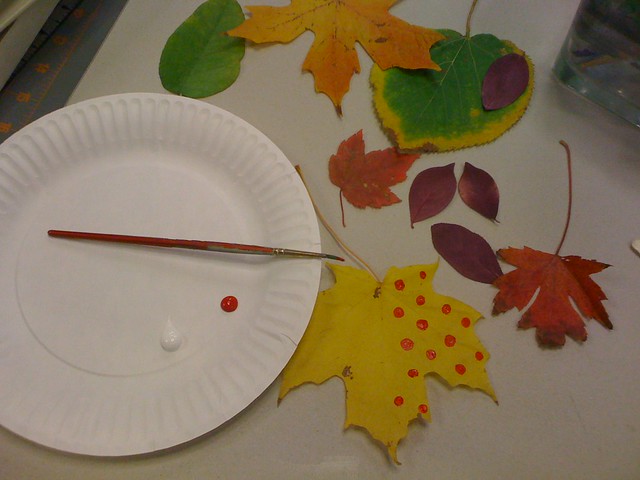
Next I painted bold patterns on my leaves with inexpensive acrylic craft paint. If you didn’t want to press or dry your leaves you could just paint right on newly fallen leaves like Alisa did.
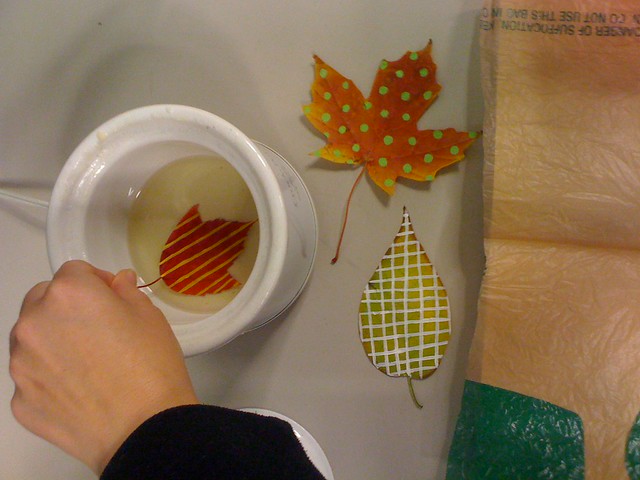
Then because I’m a craft addict, I just happen to already have a little crock pot devoted to wax, so I just warmed it up and started dipping. I was worried that the paint might come off, but it didn’t. The leaves kind of regained some curl when I pulled them from the wax. I just let the wax drip off and then set it on a plastic sheet when it was mostly cooled and pressed it between pages in a book, and they flattened again quickly.
With the dried leaves, the paint and then wax, I think these leaves will be safe and protected for a long time. As long as I am careful to store them safely each year I should be able use them again and again as a fall decoration.
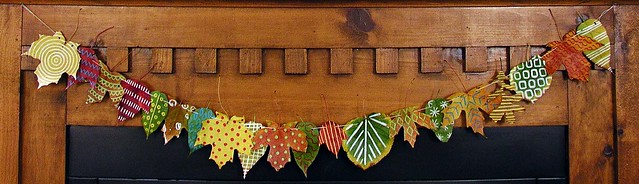
Originally I wanted to tie the stems with a string, like in the Martha Stewart diy, but hang them across, in a garland like the Alisa Burke post. When I went to attach the string to the first leaf I quickly realized it wasn’t going to work when the leaves would keep turning every which way, not laying flat or parallel to wall, AND THEN while trying to straighten the string on the stem so it would lay properly the stem broke right off. When I returned home I punched two holes in each leaf and fed a string in and out to create the banner as you can see above.
While I was working I thought this would be a great project for my sister in law and 2 year old nephew to do together. He could paint on the leaves and then she could hang them as a fall decoration. He could just paint randomly, as two year olds do, and that would be beautiful. Each year he could do more and have his name and age painted on the backs of the leaves so the garland grows over time. I also had the idea of either masking letters on each leave while he paints over it then revealing a word or phrase when you peel away the letters and string the leaves together.
We got to play situs slot, enjoy great conversation and were treated with delicious meals. It was a great second 12 Hour Craft Extravaganza and time flew by.
Can’t wait! Your leaf garland is amazing and I think Doc and I will both enjoy making them. Thanks for thinking of us. :)
I know how fast a few hours pass when you’re making a project, so I totally get the 12 hours swooshing by! LOVE your take on the leaf garland, it’s super fab and colourful. Did you see my roses? Also fun (and very easy) to make.
Wow, this is a fantastic looking garland! What a creative idea. Love it!
That turned out great! Now I want one too!
Your painted leaves are fantastic!
I´ll absolutely try this.
Have a wonderful day!
//Jenny
The leaf garland is amazing! I love it. And your day of crafting sounds idyllic.
I love the way the garland came out now I want to make one nexy year when I retire.