
The other night my best friend got inspired and requested a crafty evening at my house. She bought supplies and came over with her mystery project.
She’s a big fan of Project Runway and wanted to create some shirts inspired by Mondo Guerra’s dress, which was in turn inspired by Rorschach tests.
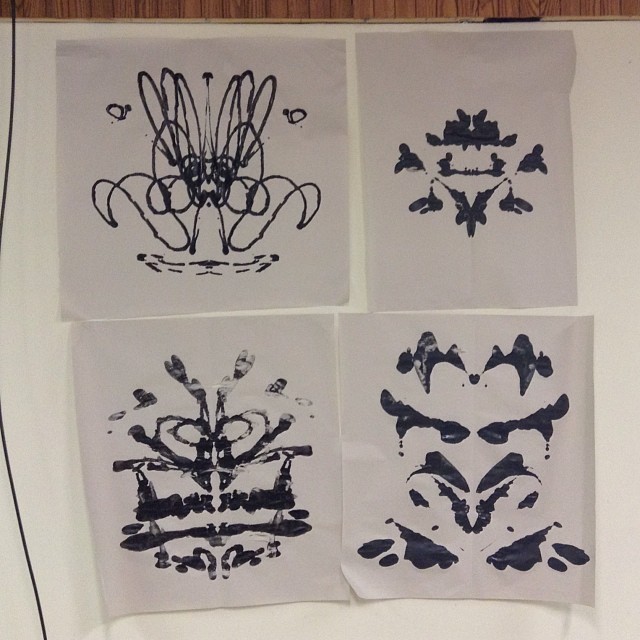
I was a little hesitant at first, so before diving into the shirts we used some newsprint and made these four samples above. Mine on the left, hers on the right. I shared the images on instagram and got a fun response of people’s interpretations. To me all Rorschach’s look like really creepy, dark and macabre images, like those seen in Scary Stories to Tell in the Dark. Being a nurse, she always sees pelvises.
So, what do you see in the images above?
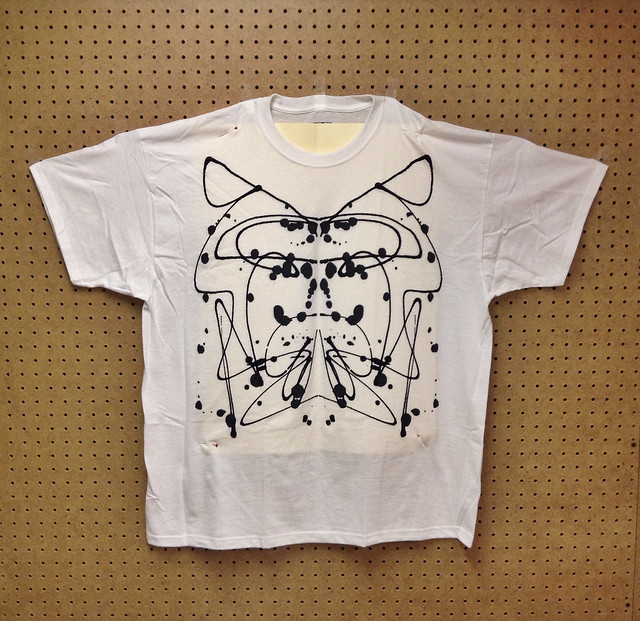
We went on to make our T-shirts and I was immediately smitten. I want to make a ton more and make them a staple in my wardrobe. Next I want to buy a black shirt and use white paint.
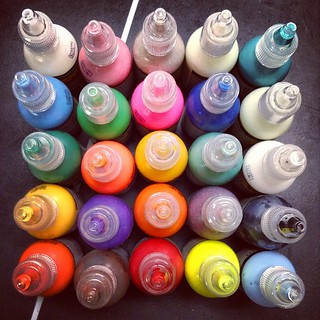
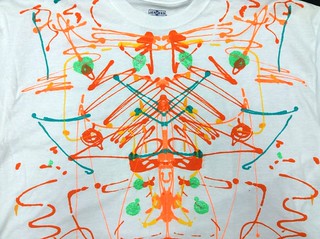
We had a variety of paint colors so I did a shirt with color, but in the future I’ll probably stuck to black and white.
Edit: Thanks to Hanna’s inquiry, I’ve added a quick tutorial below, for those of you that might want to experiment on their own.
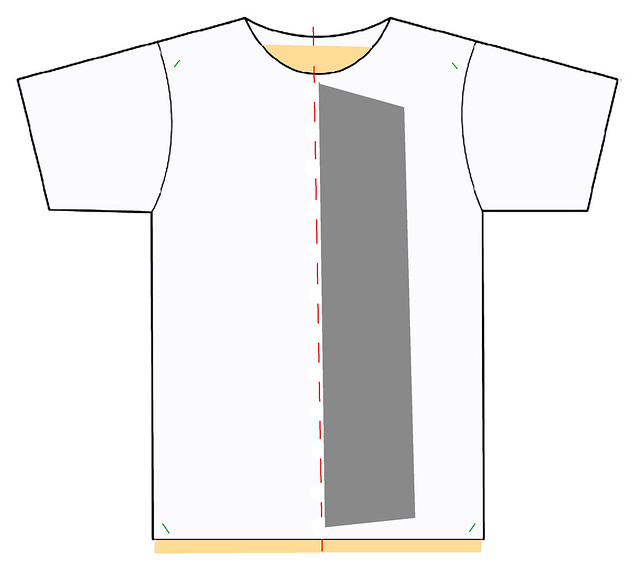
Cut a piece of paper as wide as the shirt. We folded it in half vertically so that it had a crease, opened it back up flat and put it inside the shirt (The yellow in the image above). The crease allowed us to see where the halfway fold was in the shirt and helped when we have to fold the shirt in half later (the red dotted line above). Using straight pins, pin the corners of the shirt to the paper inside so the paper doesn’t shift around (the green lines above). The paper inside the shirt also helps protect the paint from seeping through to the back of your shirt.. Then using a second piece of paper, we used wax paper, the length of the shirt, place it over one side of the shirt (the grey box above on the right side of the shirt), making sure to line it up at the halfway vertical mark. This helps protect half of the shirt.
Using fabric paints you just squirt out the paint randomly on the empty side of the shirt however you like, lines, dots, splatter, patterns, etc. If some goes on the wax paper that is fine, it is protecting the opposite side of the shirt for the time being. I found less is more. I high recommend playing around with plain paper folded in half first, so you get an idea of how much paint to use and how the paint comes out (heavy or thin, or if you have to squeeze hard, etc.). Once you are happy with the paint on the one side of the shirt, carefully remove the wax paper off the top of the shirt, and fold the shirt in half vertically. With the shirt folded in half, use your hand to smooth out the two halves, distributing the fabric paint onto both sides evenly. Open your shirt up for the big reveal and voila, your design is done!
You could use any fabric you like. Erica made a handkerchief as well as her shirts. Maybe you’d like to make a skirt, or just flat fabric that you might use to make something else later.
Our fabric paint said to let it dry for 24 hours and then wash the garment inside out.
If you make something, I’d love to see it!
The tshirt os sooo cool! But how are they made? Is it a monoprint?
Let’s see:
On the first photo of four samples, the top left looks like a flower or a rabbit with big feet jumping forward, the top right looks like a bug. The bottom left looks like a layer cake, the bottom right looks like Vincent Price.
Hee hee.
Very cool shirts, love the process!