
Here is a super quick and easy tutorial to make a very adorable festive decoration of flag bunting, sewing machine free.
The other day when I was taking product pictures for the Valentine’s Day yoyo set and I made a super mini flag garland to hang from the shadowbox frame and it got me thinking about these. I made a ton of these before I opened my Etsy shop, back in the day and I thought I had already shared them here on the Inspiration Junkie before, but it must have been on my old blog. They are easy enough to make so I thought I’d share it with you. I’ve seen flag garlands often enough on crafty blogs, but most often they are done with all fabric and require sewing. This method is just as quick, just as cute and only requires the few items shown below.
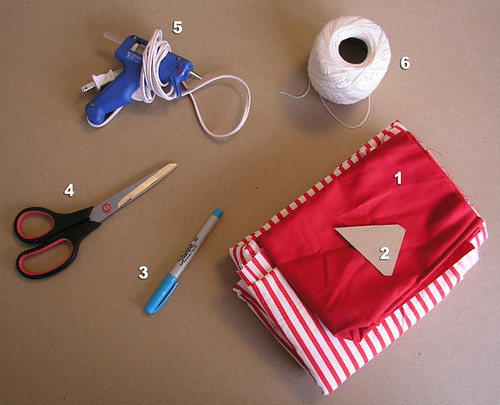
1. Fabric. I’ve chosen solid and striped red fabics for the purpose of this post, but you can use whichever fabric colors you want. I used to make these garlands using one piece of fabric from my entire stash for variety.
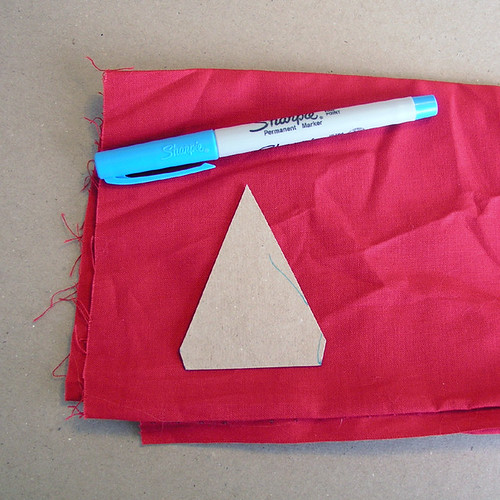
2. Cut out a cardboard template of a triangle. The height of the triangle was 3 inches. As you can see I nip off the top points of the triangles so that I can fold over the edges easily. The resulting final triangle will then be about 2.5 inches tall. You could make your triangles larger or smaller depending on your preference.
3. A pen, to trace the template onto the fabric. If you have a water soluble or disappearing ink fabric pen, wonderful, but as you can see here I opted for a sharpie just because it was close by.
4. Scissors.
5. Glue gun
6. String. I use this embroider (?) string just because it’s sturdier than thread, but not as expensive as embroider floss. But, use whatever you’d like.
Start by plugging in your glue gun. This project is a very quick one, and by the time you get to gluing, the gun should be warmed up. Check out some effective tools for gluing here.
Trace out your template onto the fabric. You can maximize your use of fabric if the finished traced template triangle alternate pointing up and then pointing down.

Cut the the traced templates out of the fabric. You can reduce the amount of cutting if you trace your templates right next to each other, so that you can cut 2 edges with one snip.
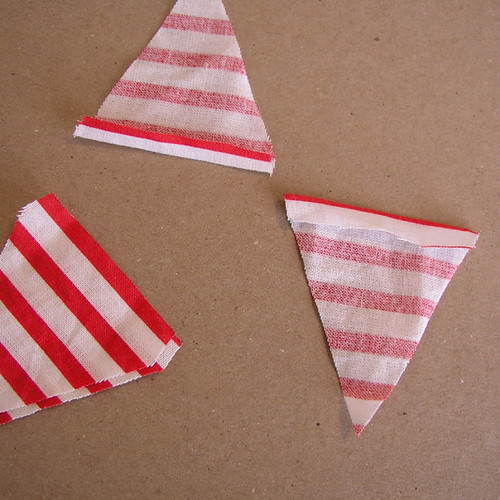
Next, I lightly score the edge of the fabric with my fingernail so that the fabric folds over easy. Bend where the corners have been nipped off. You use that line to decide where to fold the fabric, plus now the folded over edge can’t be seen from the front.
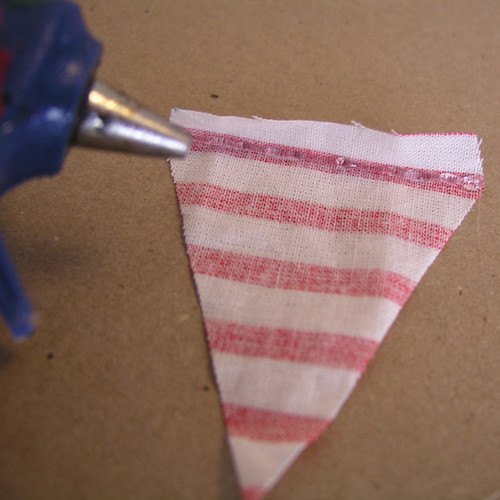
Using the glue gun, draw a thin line across the folded edge. The next few steps need to be done rapidly while the glue remains hot.

Leaving about 6-12 inches of string empty on the end, place the string right on the glue.
Fold over the fabric and crease the edge, glue and string together.
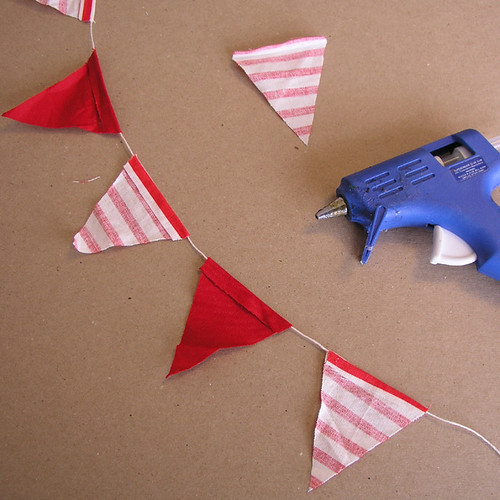
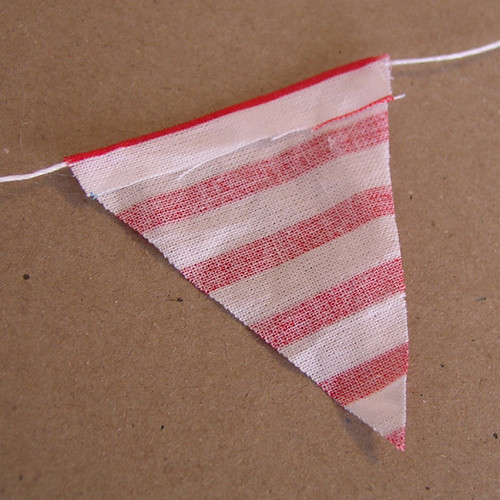
Alternating fabric and leaving as much string as you want between each flag. You may want to put the flags immediately touching each other or keep an inch of fabric between, as I have done. Glue the rest of the flags onto the string. Make sure that you keep the back and fronts of the fabric consistent so that once the garland is complete you don’t have some fabics showing the front while others show the back with the crease.
Keep alternating until desired length. Leave a bit of extra empty string on each end to use later for hanging. The edges of the fabric are left entirely raw and with my experience this is never a problem because it is used just for decoration so there is no reason the edges should fray or fraying will be minimal. You might elect to iron out any wrinkles in the fabric, but just make sure to keep iron away from the glued edge of each flag because you don’t want to melt the glue onto your iron.
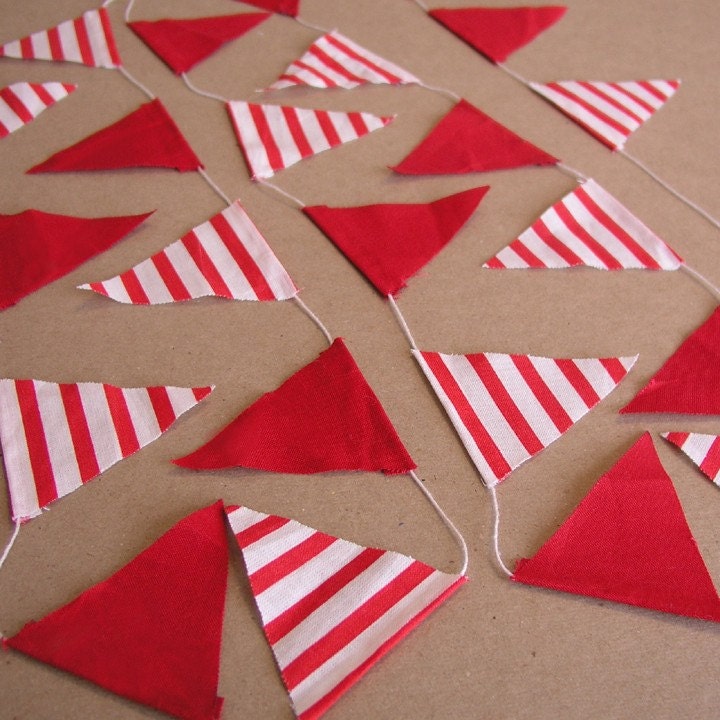
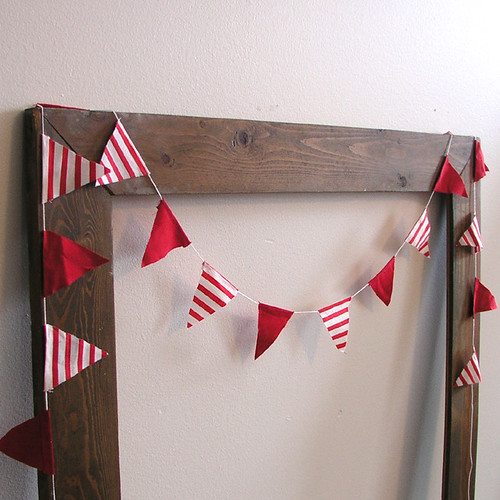
Voila! An adorable bunting for you to hang just about anywhere.
And just for fun, I’ve added this particular garland, which is 6.5 feet of mini flags, to my Etsy shop, if you’d be interested in purchasing it.
I just LOVE this idea! Thanks!!!!
Those are SO fantastic! Think I might need to make those for summer!
I featured this tutorial on my blog! Congrats, grab a button from the post! http://lillianpearl.blogspot.com/2011/03/reusable-bunting-notes-tutorial.html
Since the admin of this web page is working, no question very
rapidly it will be well-known, due to its feature contents.
I’m no longer certain the place you are getting your information, however great topic. I must spend some time studying much more or understanding more. Thank you for wonderful information I used to be in search of this info for my mission.
Also visit my weblog; Regan