
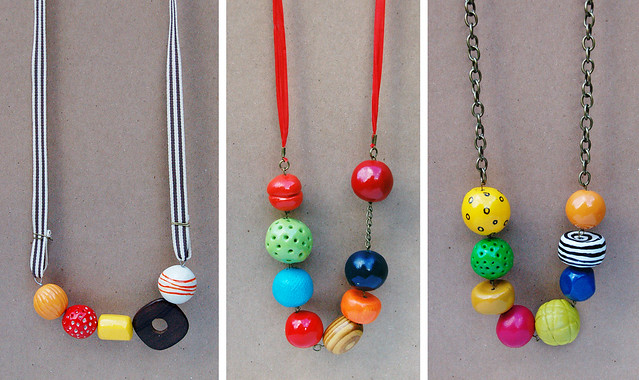
Hello friends, I started a little craft project recently and made these colorful, chunky beaded necklaces. They were really fun, easy and inexpensive to make, so I thought I’d share a little tutorial on how you can make your own paper clay bead necklaces. If you do end up making some, I’d love to see how they come out.
A few years back I was at an Old Navy store and they had some necklaces that caught my eye. They were bright and colorful, big, plastic, chunky beads and I was tempted to buy one, but something stopped me. I can’t remember if it was because they were all monochromatic color schemes, or all the beads were the same shape, or what, but I thought to myself “I could make a necklace like that for myself, but even more AWESOME.” I envisioned a statement piece of jewelry, with a variety of big chunky beads in different color schemes, that were candy like. Occasionally I would remember the necklace idea and would check out the craft stores for some big, colorful beads, but every time, there were no BIG beads, let alone any with a variety of BRIGHT colors and shapes. The closest I could find were some wood beads for little kids to learn to count on and string for fine motor skills. Fast forward to earlier this year and I remembered some paper clay I bought from my expedition into scary doll making and decided to take a crack at making my own necklace.

Here are the necklaces I made being modeled on my lovely sister in law, Dacia on the right, and her lovely sister Alyssa on the left, to show how long I chose to make my necklaces.
Materials
Paper Clay
Mark Making Tools for clay (pencil, mesh, string)
Acrylic Paint
Paint Brush
Colored Pencils (optional)
Cardboard Box
Florist Wire
Drill or needle/thin knitting needle
Sandpaper
File
Clear Glaze Spray
Jewelry making supplies as needed for your taste
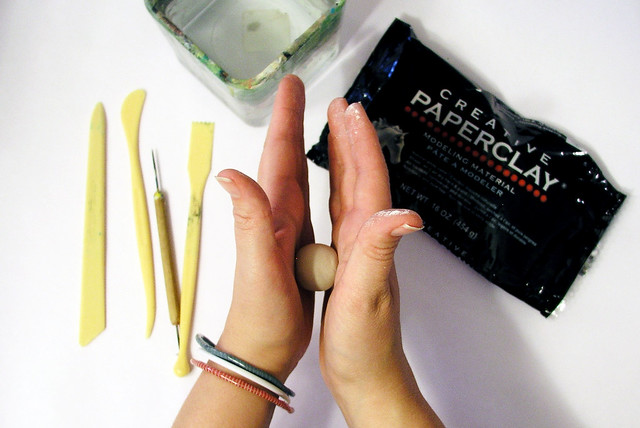
The idea to use Paper Clay came to me because it is easily malleable, light and air dries. You can buy it fairly inexpensively at craft stores for around $9 for a pack. Just make sure that you keep it sealed after you open it. However, even if it does dry out, just put it in a ziplock bag with a little bit of water and kneed it back into shape.

I wanted to make my beads big and chunky so I just rolled them out to size. Some beads I rolled out to be round, some beads were more cylindrical, some were more flat. I used various items, such as a pencil and some old pottery tools, as well as mesh, to give my beads unique texture. Be creative! You can do whatever comes to mind. The instructions said to let the paper clay dry for 24 to 48 hours. Since my beads were rather thick I actually waited 4 days. The clay goes from being light gray to almost white when dry. Don’t worry about the beads being perfect, you can sand and file them once they are dry.
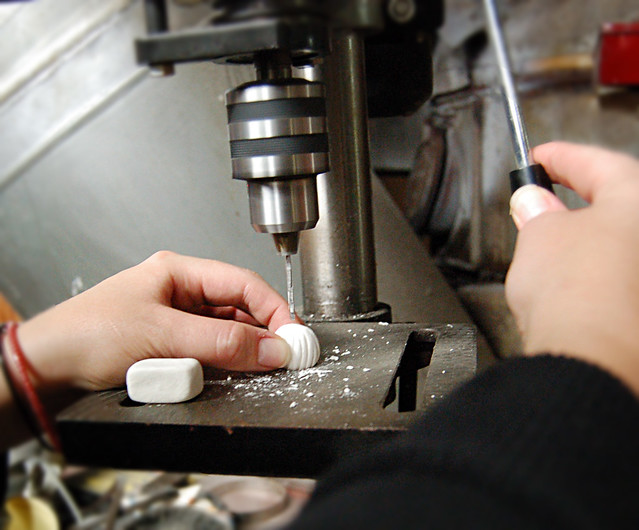
Once my beads were dry I used my dad’s drill press to drill the bead holes. If you don’t have access to that, you could use a handheld drill, a dremel, or even poke a hole while the bead is still drying. If you decide to poke a hole through, I’d recommend letting the bead dry for a few hours first so that you don’t misshape the piece while pushing a needle through it. You need to think a little ahead at this point, when choosing a drill bit, or needle size. Think about how you want to thread your beads. At first I was thinking I would simply string them on a ribbon so I chose a fairly thick drill bit. After everything was said and done, I actually changed my mind and decided to use eye pins to give each bead a more finished look. My holes were then a bit too large for the eye pins so I had to widen the end ring a touch.
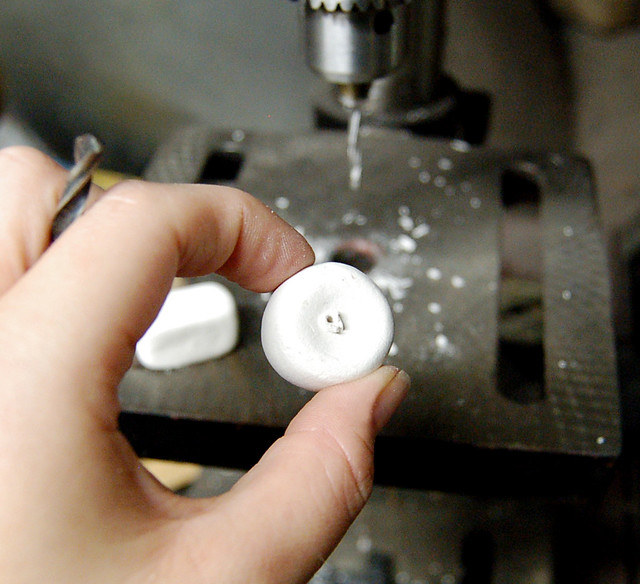
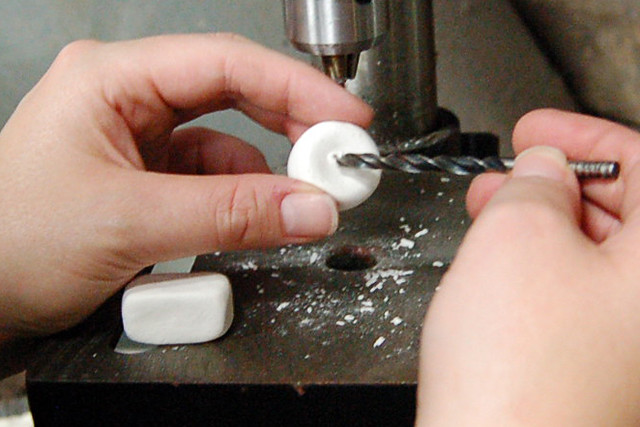
Here’s a little trick I learned taking metal and jewelry classes – when you drill a hole you’ll often get a bit of a rough edge on the back. Take a larger drill bit than the one are using and gently twist the tip into the hole as shown above. It will smooth away that edge and finish the piece.
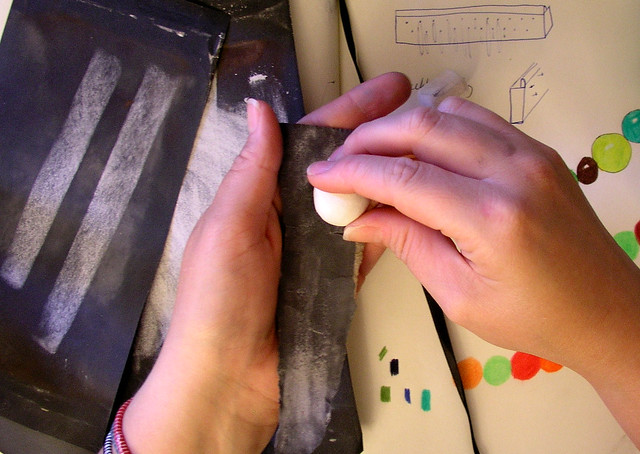
From here I sanded my beads to give them a more smooth surface. I also used the sand paper to give some flat edges, and a file to groove edges on others for added texture and character.
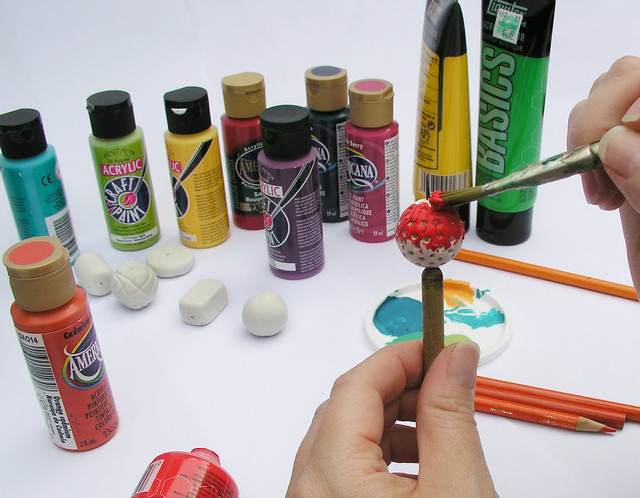
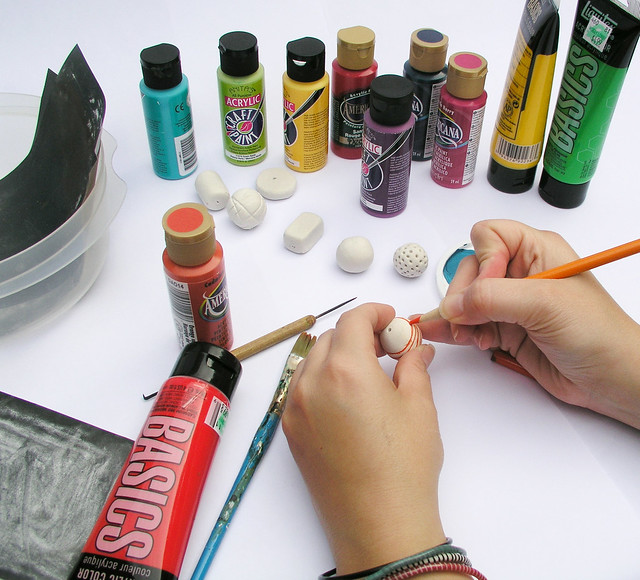
When painting the beads I used a tool I had on hand to hold the bead so that I could paint the whole bead evenly. You could also use a pin/needle or thin knitting needle, etc. The paper clay is a very dry, porous clay and will take whatever you put on it very easily. Paint them solid or patterned. You could use acrylic paint, or let the translucent quality of watercolor work in your favor. Draw on the beads with colored pencils, sharpies, etc. You could even leave them plain for all white beads. The possibilities are endless.
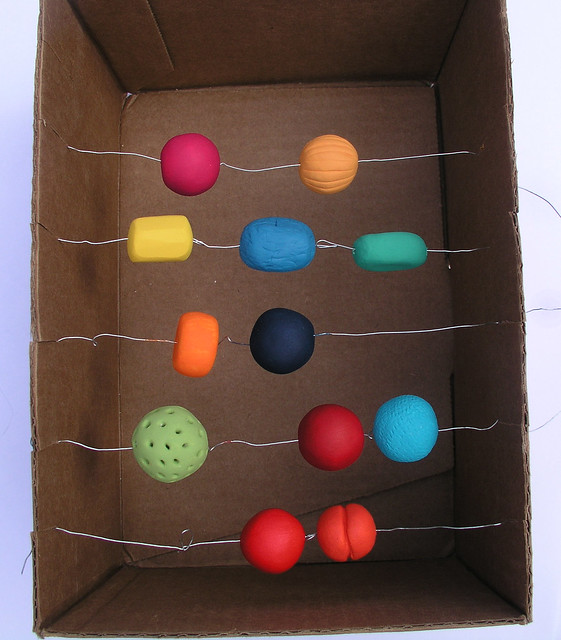
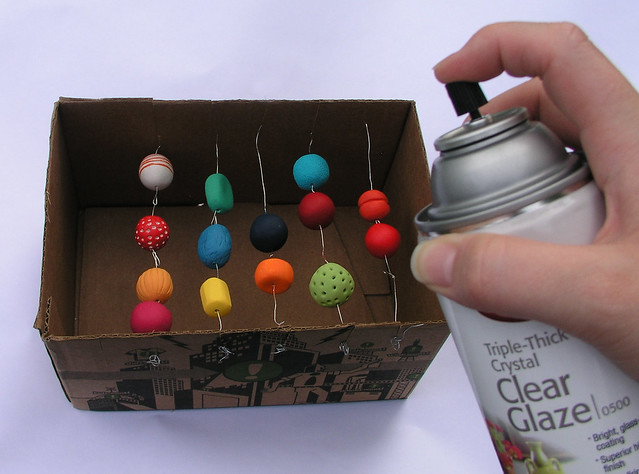
After each bead was decorated, I put them in this make-shift box as seen above. I cut slits in the side of the cardboard and fed the wire through so all the beads would be evenly spaced. Then I sprayed the beads with the clear glaze spray. I used Krylon, triple-thick crystal clear glaze and I can’t recommend this stuff enough. No matter how thick I sprayed it on, it would dry clear and fairly quickly, in 10-20 minutes. Make sure you do this outdoors or a place with plenty of air circulation and ventilation because the spray’s fumes are very strong. After I sprayed the beads I had to rotate them and spray them again, doing this about 4 or 5 times to get an even, high gloss.
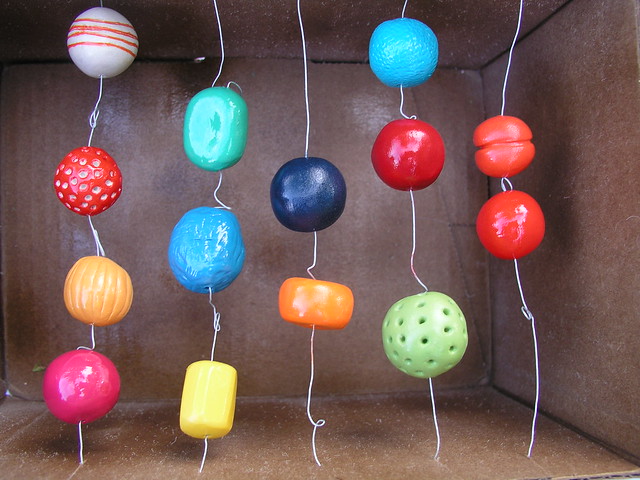
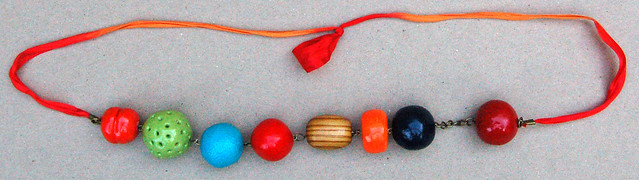
Once the beads are sealed with the spray they are good to go. You can assemble them however you like. Put them on a ribbon, a wire, or chain. Add different beads you have purchased. Have them close to the neck or hang low. Use your creativity. I’ve been wearing my necklaces now for a few weeks and they have held up against the test of Robyn Demolition, where in a I destroy most things I come in contact with. These were fun to make and I hope to see how you apply your own creativity to this project!
These are terrific. I especially love the big size you made and how you strung them. Nice tutorial as well.
I looooove these. I will try my hand at them soon. :)Thanks for sharing this great tutorial.
Paper clay is so fun! Great tutorial!
Oh these are so fun! Wonder if I have paper clay lying around?! If not I’ll put it on the list. Thanks and look forward to the Etsy update too.